Static Analysis quickstart
This quickstart guides you through a Veracode Static Analysis of a demo application using the Veracode Platform. The Veracode Platform is a web console for managing your entire application security program. Scanning and running a Static Analysis of a Veracode demo application helps you understand the core concepts of performing a Static Analysis and how you can quickly get results.
Video: Static Analysis quickstart
To run your first Static Analysis, complete the following tasks:
- Obtain a user account with the required roles.
- Download a demo application for your first Static Analysis scan.
- Sign in to the Veracode Platform.
- Use the Veracode Platform to create an application profile, submit your first scan, and review the results.
Obtain a Veracode user account
- To access the Veracode Platform, you must have a Veracode UI user account.
- To configure scans, submit scans, and review scan results, your UI user account must have the Creator, Submitter, and Reviewer roles.
Check with the Veracode Administrator for your organization to confirm that you have a user account with the required roles and team membership. If you are a Veracode Administrator, your user account likely has the required roles. If it does not, you can add roles to your user account in the Veracode Platform.
Download a demo application
To complete this quickstart, download the pre-packaged demo application verademo.war and save it to your desktop. This demo application is compiled Java code in a WAR file that meets Veracode compilation and packaging requirements. It includes flaws that you can review in the scan results.
Sign in to the Veracode Platform
Sign in to the Veracode Platform using the domain for your region. Each region has a unique URL. This quickstart uses the Commercial Region domain: analysiscenter.veracode.com. Your user account might be in a different domain, such as the European Region: analysiscenter.veracode.eu
- If you have a new user account, you received a welcome email that provides a link for activating your account in the Veracode Platform. If you did not receive the welcome email, contact your Veracode Administrator.
- If you have an active user account, you can sign in to the Veracode Platform using the domain for your region. If your organization uses a Single-Sign-On (SSO) portal such as Okta, you can also access the Veracode Platform with SSO.
Create your first application profile
Application profiles define the importance of the application to your organization, the security policy to apply during Static Analysis, who can view the results, and metadata you can use with Veracode integrations.
This quickstart requires creating a new application profile. Running a scan with this profile will use a Veracode license. Also, the scan results from verademo.war can affect the results of future scans. To restore the consumed license and to completely remove both verademo.war and the scan results from your account, contact Veracode Technical Support.
These are example values for this quickstart to ensure a successful scan. Veracode does not recommend using these values in production application profiles.
To complete this task:
-
On the Platform Home page, select My Portfolio > Applications.
-
On the All Applications page, select Add New Application.
-
On the Add New Application page, enter values for the following required fields.
- Application Name: enter a unique name for this application profile. For example,
Verademo-{your-initials}. - Business Criticality: select Very Low. Business criticality specifies the importance of securing the application and the negative impact to your organization if an attacker compromises this application.
- Policy: after you set Business Criticality to Very Low, this setting defaults to Veracode Recommended Very Low. A security policy determines whether the flaws that Veracode found in your application meet specific security standards. In the scan results, flaws that do not comply with the selected policy are highlighted. Before your application can pass policy, you must fix all highlighted flaws. For this quickstart, because the lowest policy setting is selected, you do not see highlighted flaws in the scan results for
verademo.war. - Access: select Edit. Under Available Teams, select your team. You must be a member of the selected team to access this new application profile. If you do not see any teams, contact your Veracode Administrator. Select Add to add the team to Selected Teams, then select Save.
- Application Name: enter a unique name for this application profile. For example,
-
Select Submit to create the application profile.
Submit your first scan request
You can now use the Veracode Platform to scan the application and run a Static Analysis using the selected security policy.
To complete this task:
-
On the All Applications page, select the name of your new application profile.
-
On the Application page, select Start a Scan > Start a Static Scan.
-
Enter a unique name for the scan or accept the default, which is the current date followed by
Static. -
Under Auto-Scan, set Auto-Scan after Prescan to Off.
For Static Analysis, a prescan evaluates your uploaded application to ensure you compiled and packaged it correctly prior to scanning. It also identifies the top-level modules, or components, in your application, including any third-party dependencies or supporting files that these modules call. Top-level modules are components your organization created. If this option is set to On and your application passes prescan, Veracode automatically selects the top-level modules and starts the scan. With this option set to Off, scanning does not start automatically after prescan and you can manually select the modules to include or exclude in the scan.
If your user account is on the European region or United States Federal region, on the Package Application step of the wizard, select Continue to skip the packaging step, as
verademo.waris already packaged. -
Select Save and Continue.
-
On the Upload Files page, select Select Files.
-
Locate and select
verademo.war. Then, select Open to upload the file. -
After the upload is complete, select Next.
-
For this quickstart, on the Reviewing Modules page, wait for the prescan to complete. The spinning wheel under Validate Upload indicates when prescan is actively running. After prescan is complete, the spinning wheel stops and you receive an email stating that you can now start the policy scan.
-
Review the Prescan Status column for any packaging errors for your application. Because
verademo.warmeets the Veracode compilation and packaging requirements, you should not see any prescan status errors. -
On the Select Modules to Scan page, select the Advanced Mode tab.
-
On the Modules tab, select the Entry Point? checkbox to select all top-level modules in
verademo.war. The top-level modules in your application are the entry points that Veracode uses to determine which components, including third-party dependencies, to scan.
-
Select Start Scan. If your user account is in the European region or United States Federal region, go to the Review and Submit step and select Submit Scan.
-
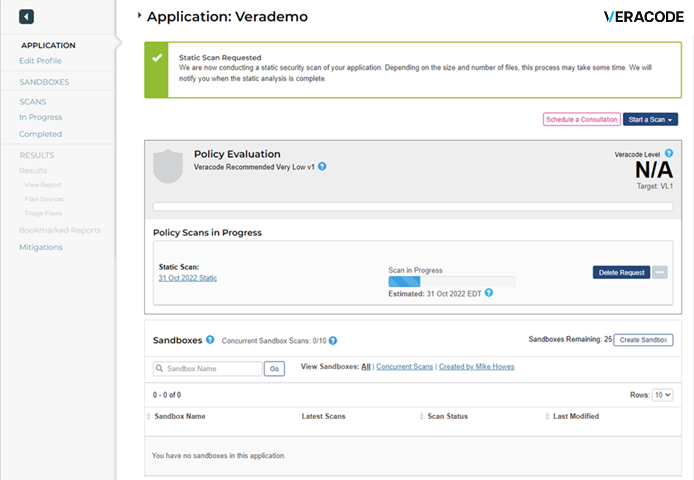
Wait for the scan to complete, as indicated by the Scan in Progress bar. You receive three emails: after you submit the scan, when partial scan results are available, and when the scan is complete. You can review the partial results while you wait for the complete scan results. If the Scan in Progress bar appears stuck, refresh your browser to see if it updates.
Review example scan results
After the Static Analysis completes, review the results in the Veracode Platform or from a link in the scan results email.
This task assumes you are on the Application page for verademo.war: select My Portfolio > Applications > Verademo.
To complete this task:
-
In the left pane, select Triage Flaws to see a table of discovered flaws.
-
Optionally, to hide the Source Code View window, in the top-right corner, set Show to None. Next to this option, you can also select Max to hide the navigation bar.
-
In the ID column, select the right arrow next to a flaw ID to access detailed information and remediation guidance for that flaw.
