Set up and use the ServiceNow connector
The Veracode Risk Manager (VRM) connector for ServiceNow integrates VRM’s best next actions and issues with ServiceNow’s IT Service Management (ITSM) plugin. It leverages the ServiceNow API to create incident or request tickets to ensure VRM’s powerful recommendations get to the next stage of remediation and are routed to the correct team workflows.
Complete the following tasks to set up and use your VRM connector for ServiceNow.
ServiceNow requirements
You must create a ServiceNow user account that has write access to the Incident [incident] and Request [sc_request] tables. Veracode recommends that you set the user as Web service access only and include Longbow in the user ID to clearly indicate that the tickets associated with this account are generated from VRM.
Create a VRM connector
- In VRM, from the left navigation menu, select the Settings icon
 .
. - Select Add Connector.
- Select the ServiceNow tile.
- Enter a name for the connector.
- Enter your organization's ServiceNow URL.
- Enter your ServiceNow username and password.
- Select Add Connector.
Creating tickets in VRM
The ServiceNow connector lets you create ServiceNow tickets from the Issues page, directly from an issue summary, and from the Solutions page in VRM.
Create a ticket from the Issues page
- In VRM, select the Issues icon
 from the left navigation menu.
 - Select the checkbox for an issue.
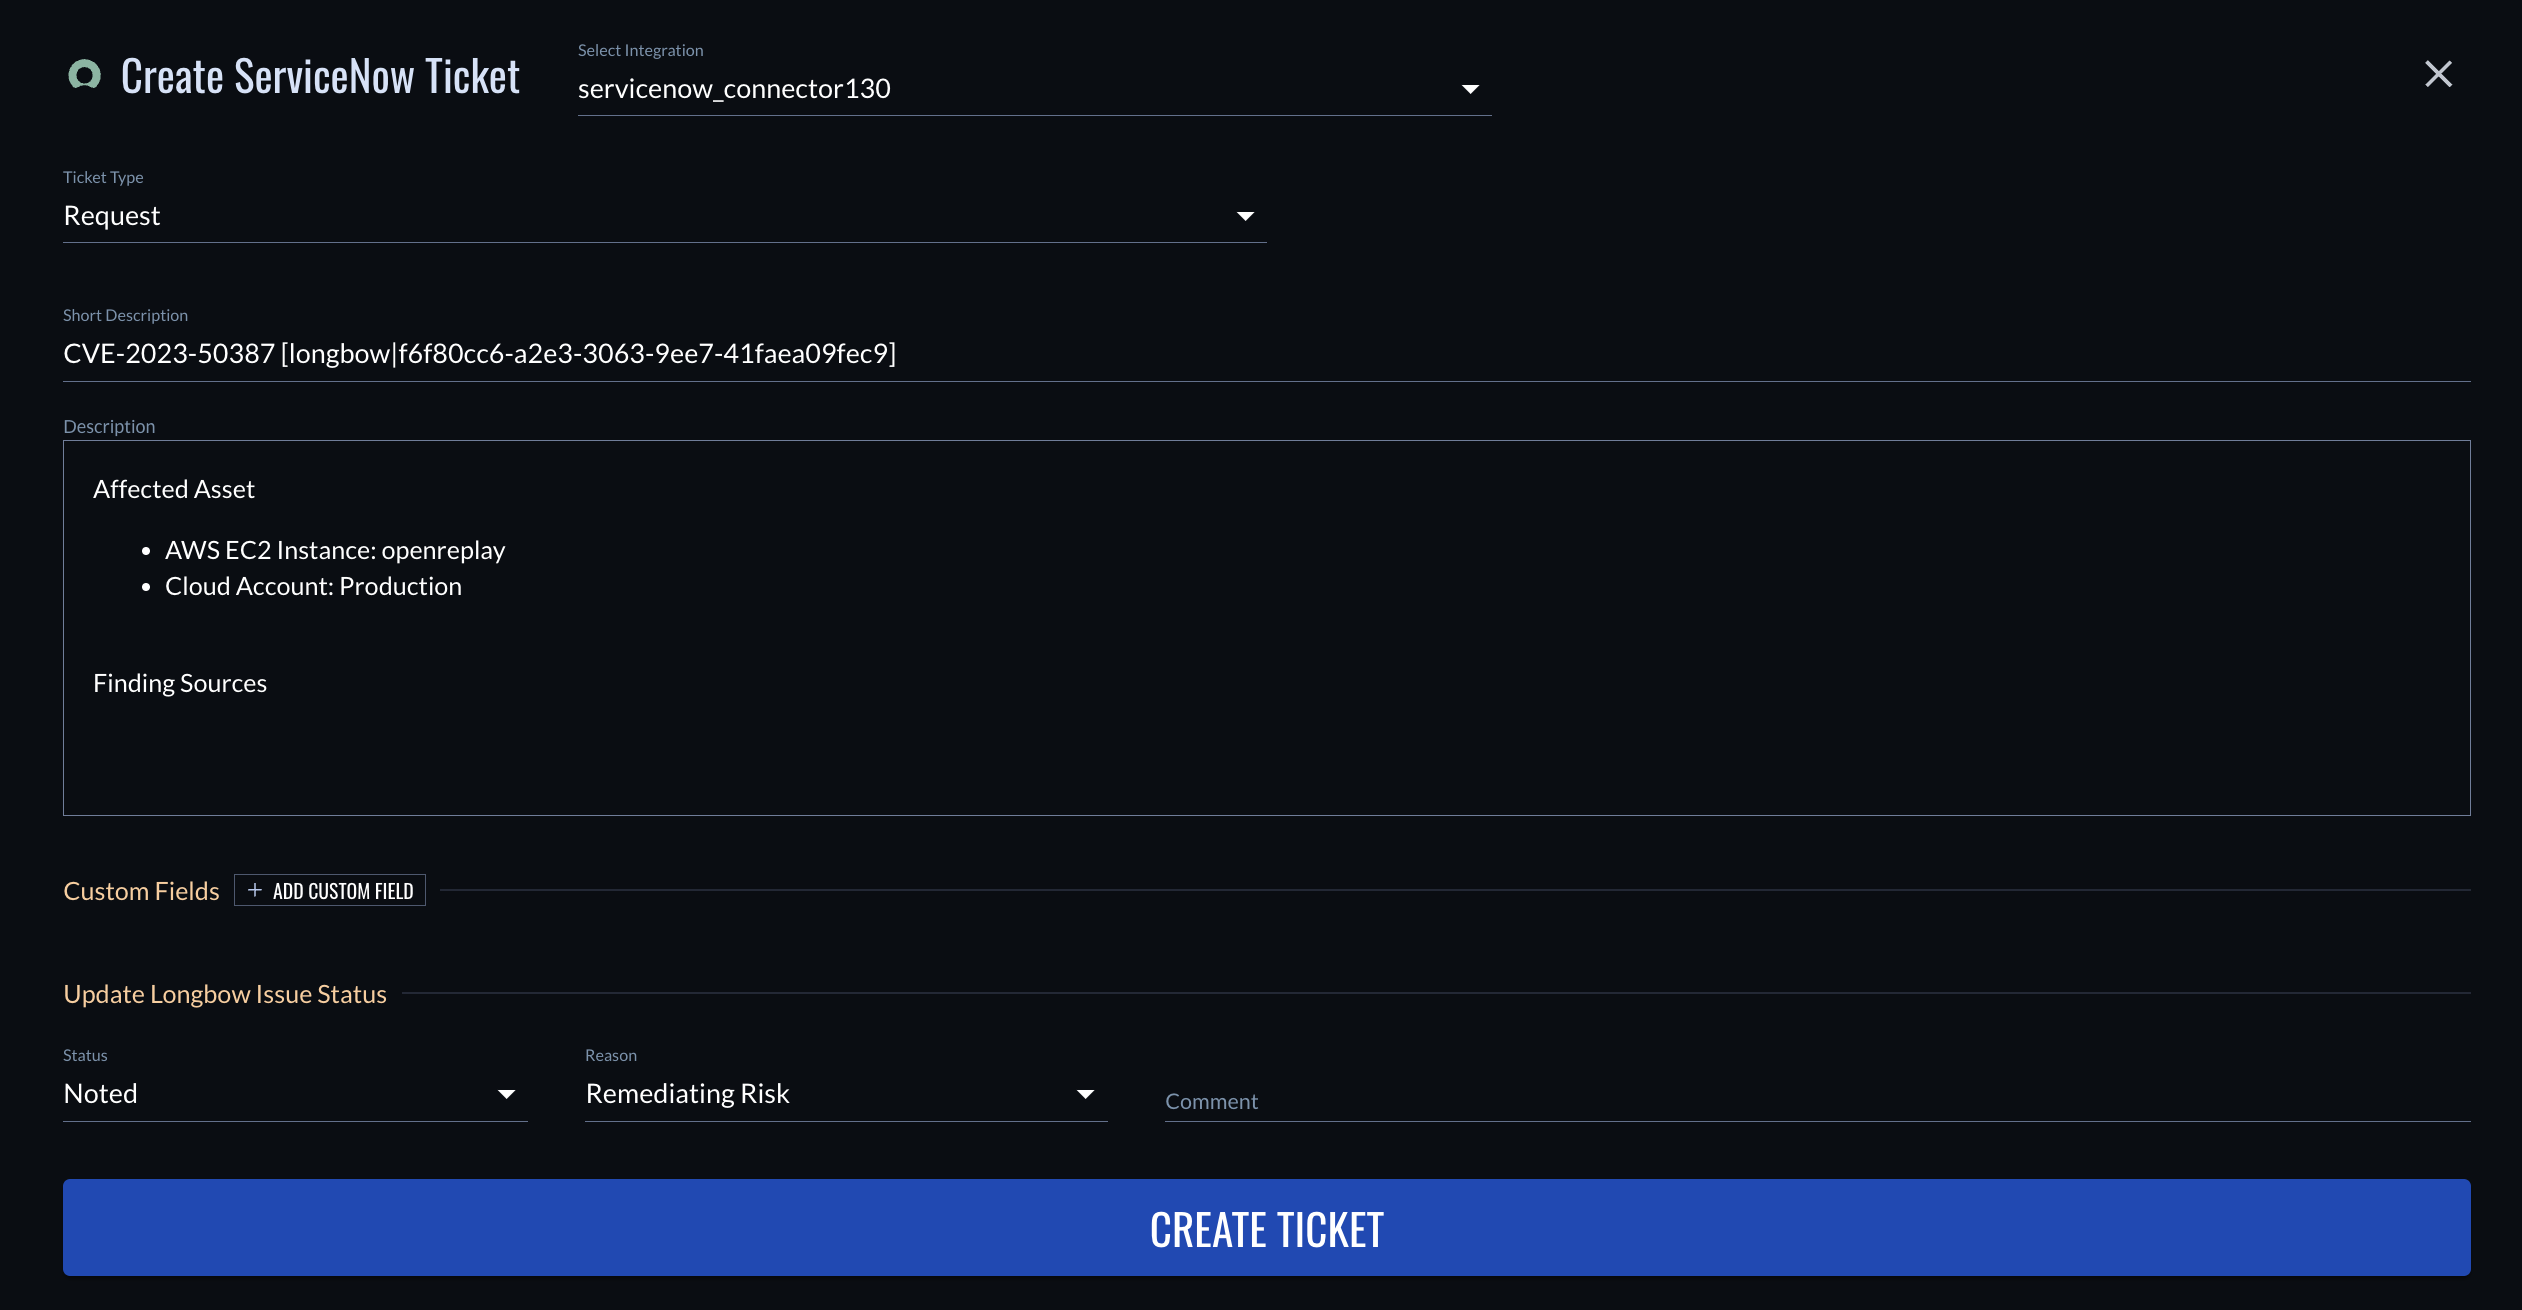
- Select Actions > Create Ticket. VRM generates a ServiceNow ticket with following fields pre-populated:
- Select Integration: the name of your ServiceNow connector.
- Ticket Type:
RequestandIncidentare the only supported ticket types. - Short Description: the name of the issue. Not editable.
- Description: an outline of the affected assets, where the issues were detected, and possible solutions. Not editable.
- Custom Fields: see Custom fields for details.
- Status: the workflow status of the issue in VRM. By default, creating a ticket moves the status to
Noted. - Reason: the reason that the status is changing. By default, creating a ticket sets the reason to
Remediating Risk. - Comment: comments to include in the ServiceNow ticket.
- If necessary, edit the pre-populated fields.
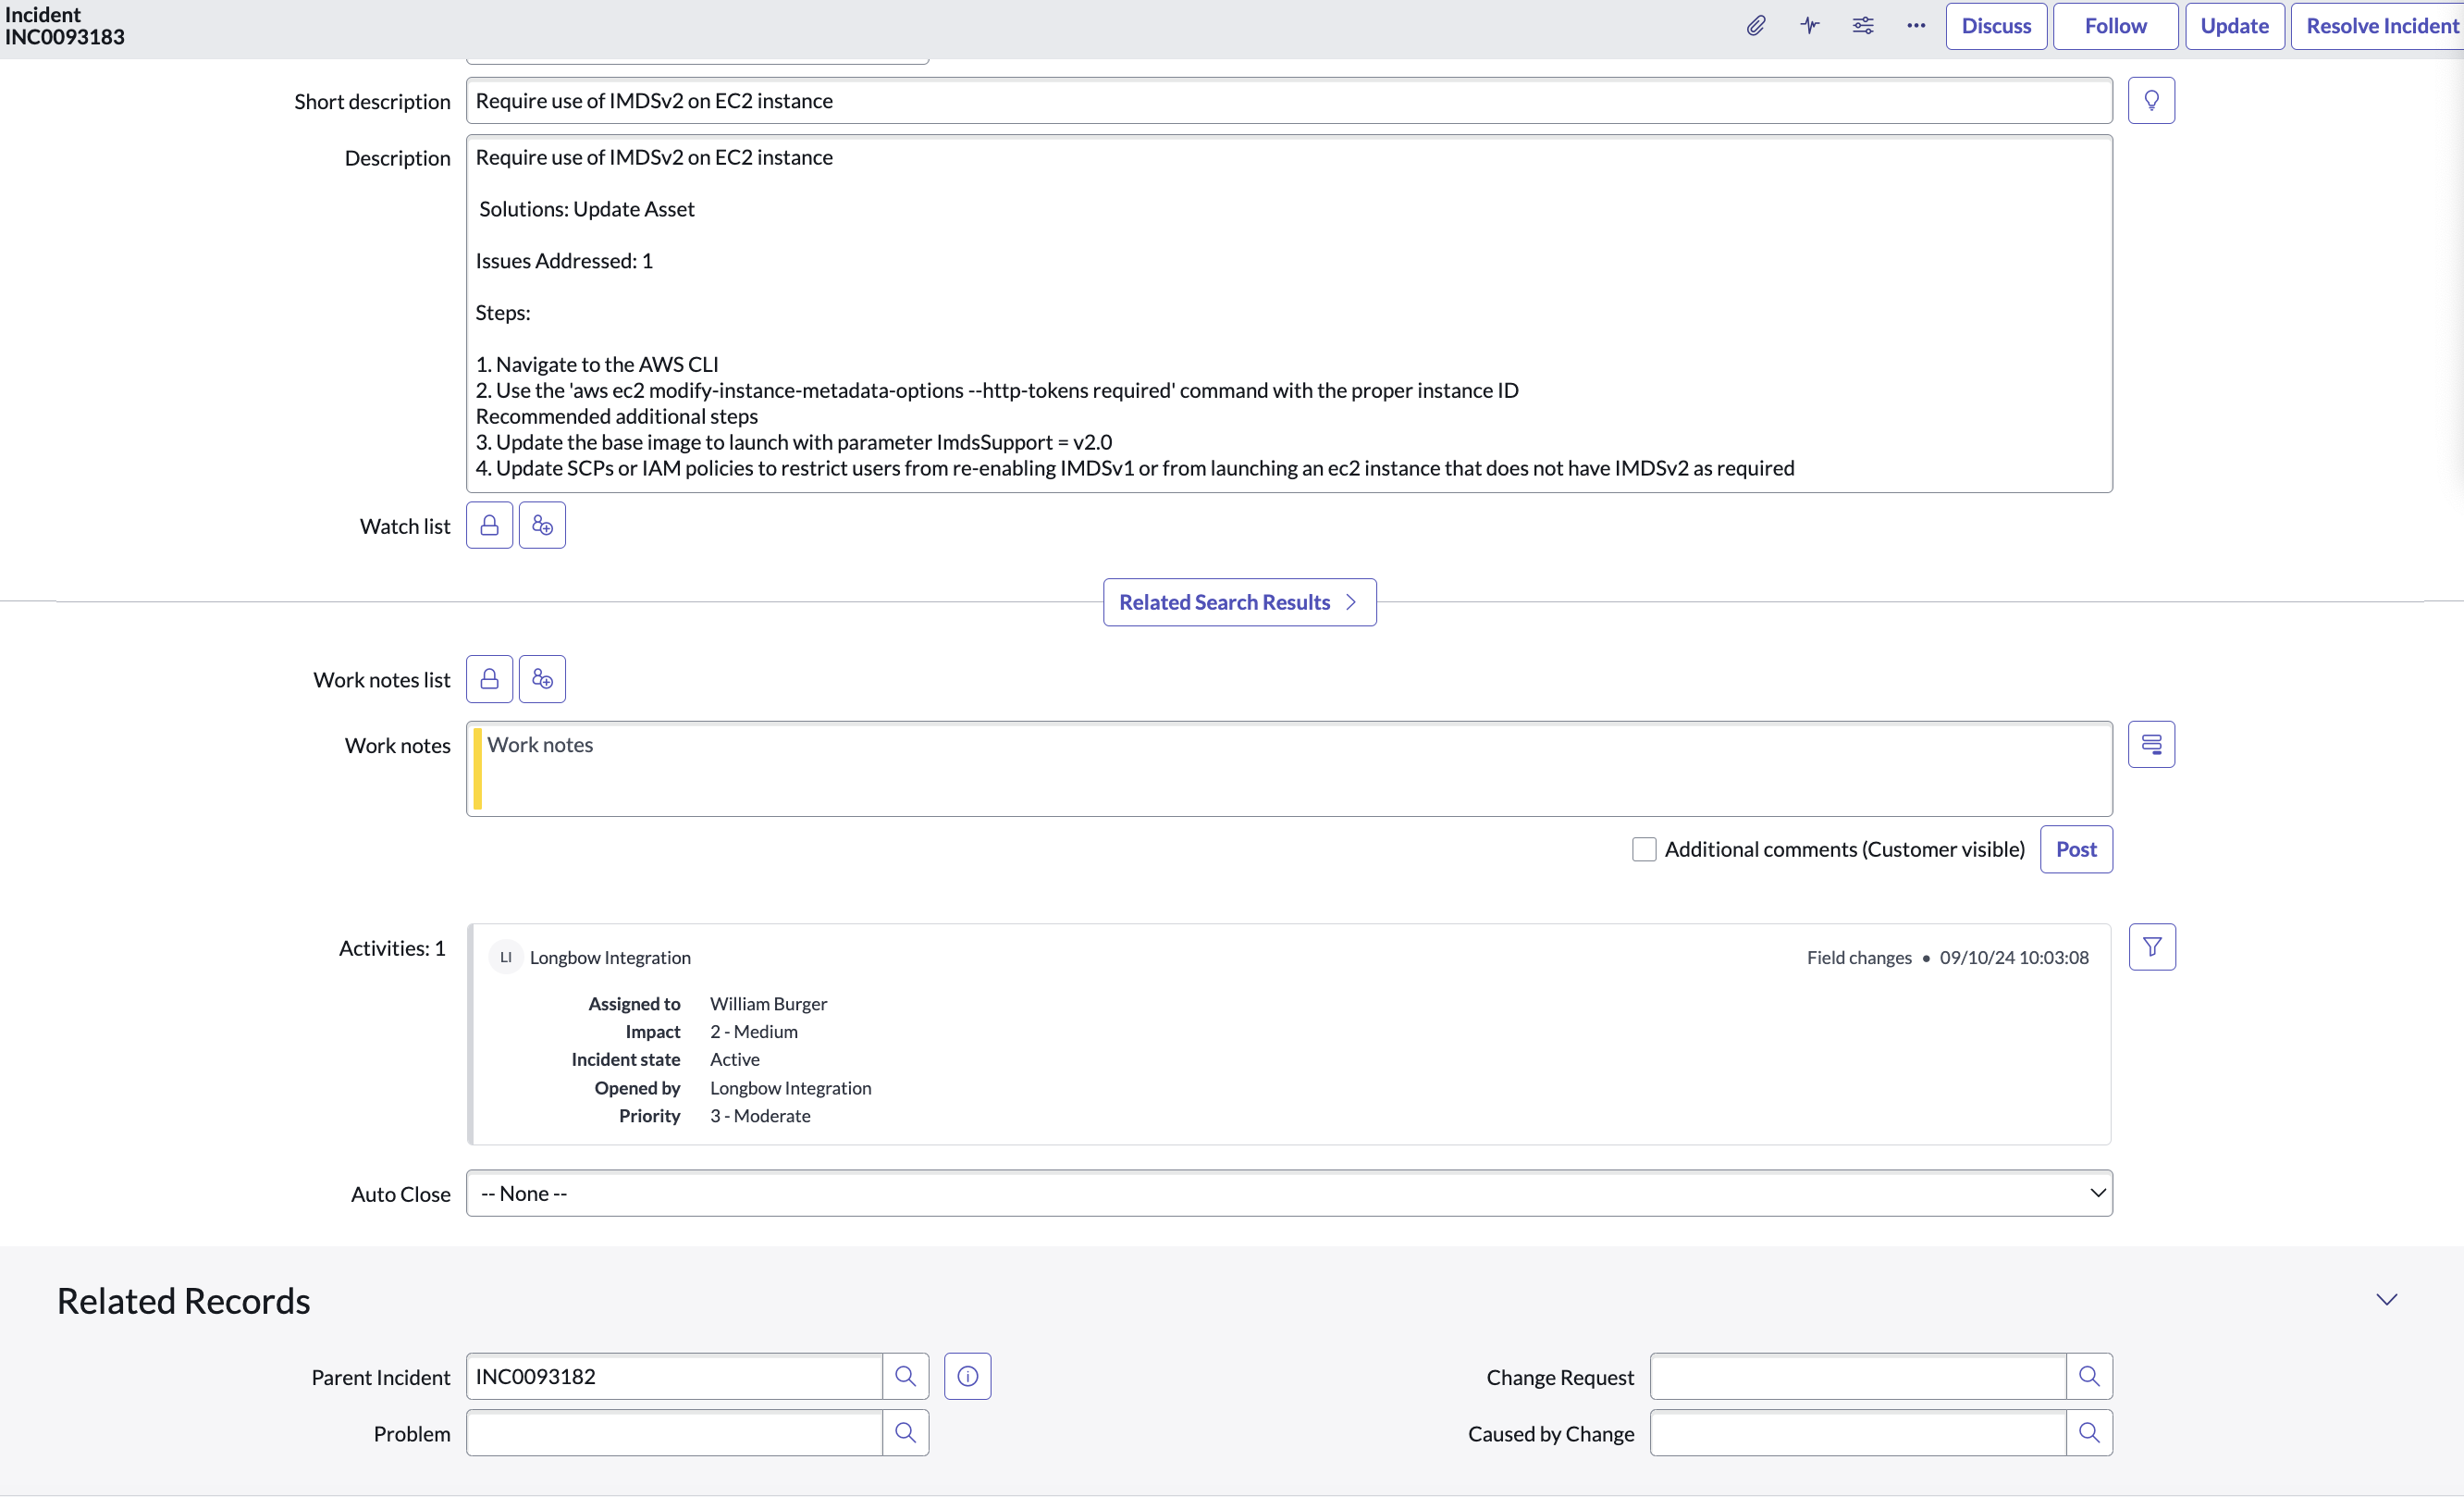
- Select Create Ticket. When the ticket is created in ServiceNow, a pop-up window appears in VRM that includes a link to the ticket. For example:
Create a ticket from the Issue Summary page
- In VRM, select the Issues icon from the left navigation menu.
- Select an issue.
- Select Create Ticket in the upper-right corner of the screen. If a ticket already exists for an issue, select Tickets > File Another Ticket in the upper-right corner of the screen. VRM generates a ServiceNow ticket with following fields pre-populated:
- Select Integration: the name of your ServiceNow connector.
- Ticket Type:
RequestandIncidentare the only supported ticket types. - Short Description: the name of the issue. Not editable.
- Description: an outline of the affected assets, where the issues were detected, and possible solutions. Not editable.
- Custom Fields: see Custom fields for details.
- Status: the workflow status of the issue in VRM. By default, creating a ticket moves the status to
Noted. - Reason: the reason that the status is changing. By default, creating a ticket sets the reason to
Remediating Risk. - Comment: comments to include in the ServiceNow ticket.
- If necessary, edit the pre-populated fields.
- Select Create Ticket. When the ticket is created in ServiceNow, a pop-up window appears in VRM that includes a link to the ticket. For example:
Create a ticket from the Solutions page in VRM
- From the Solutions page in VRM, expand the remediation for which you want to create a ticket.
- Select the items from the Summary of Changes table that you want to include in the ticket.
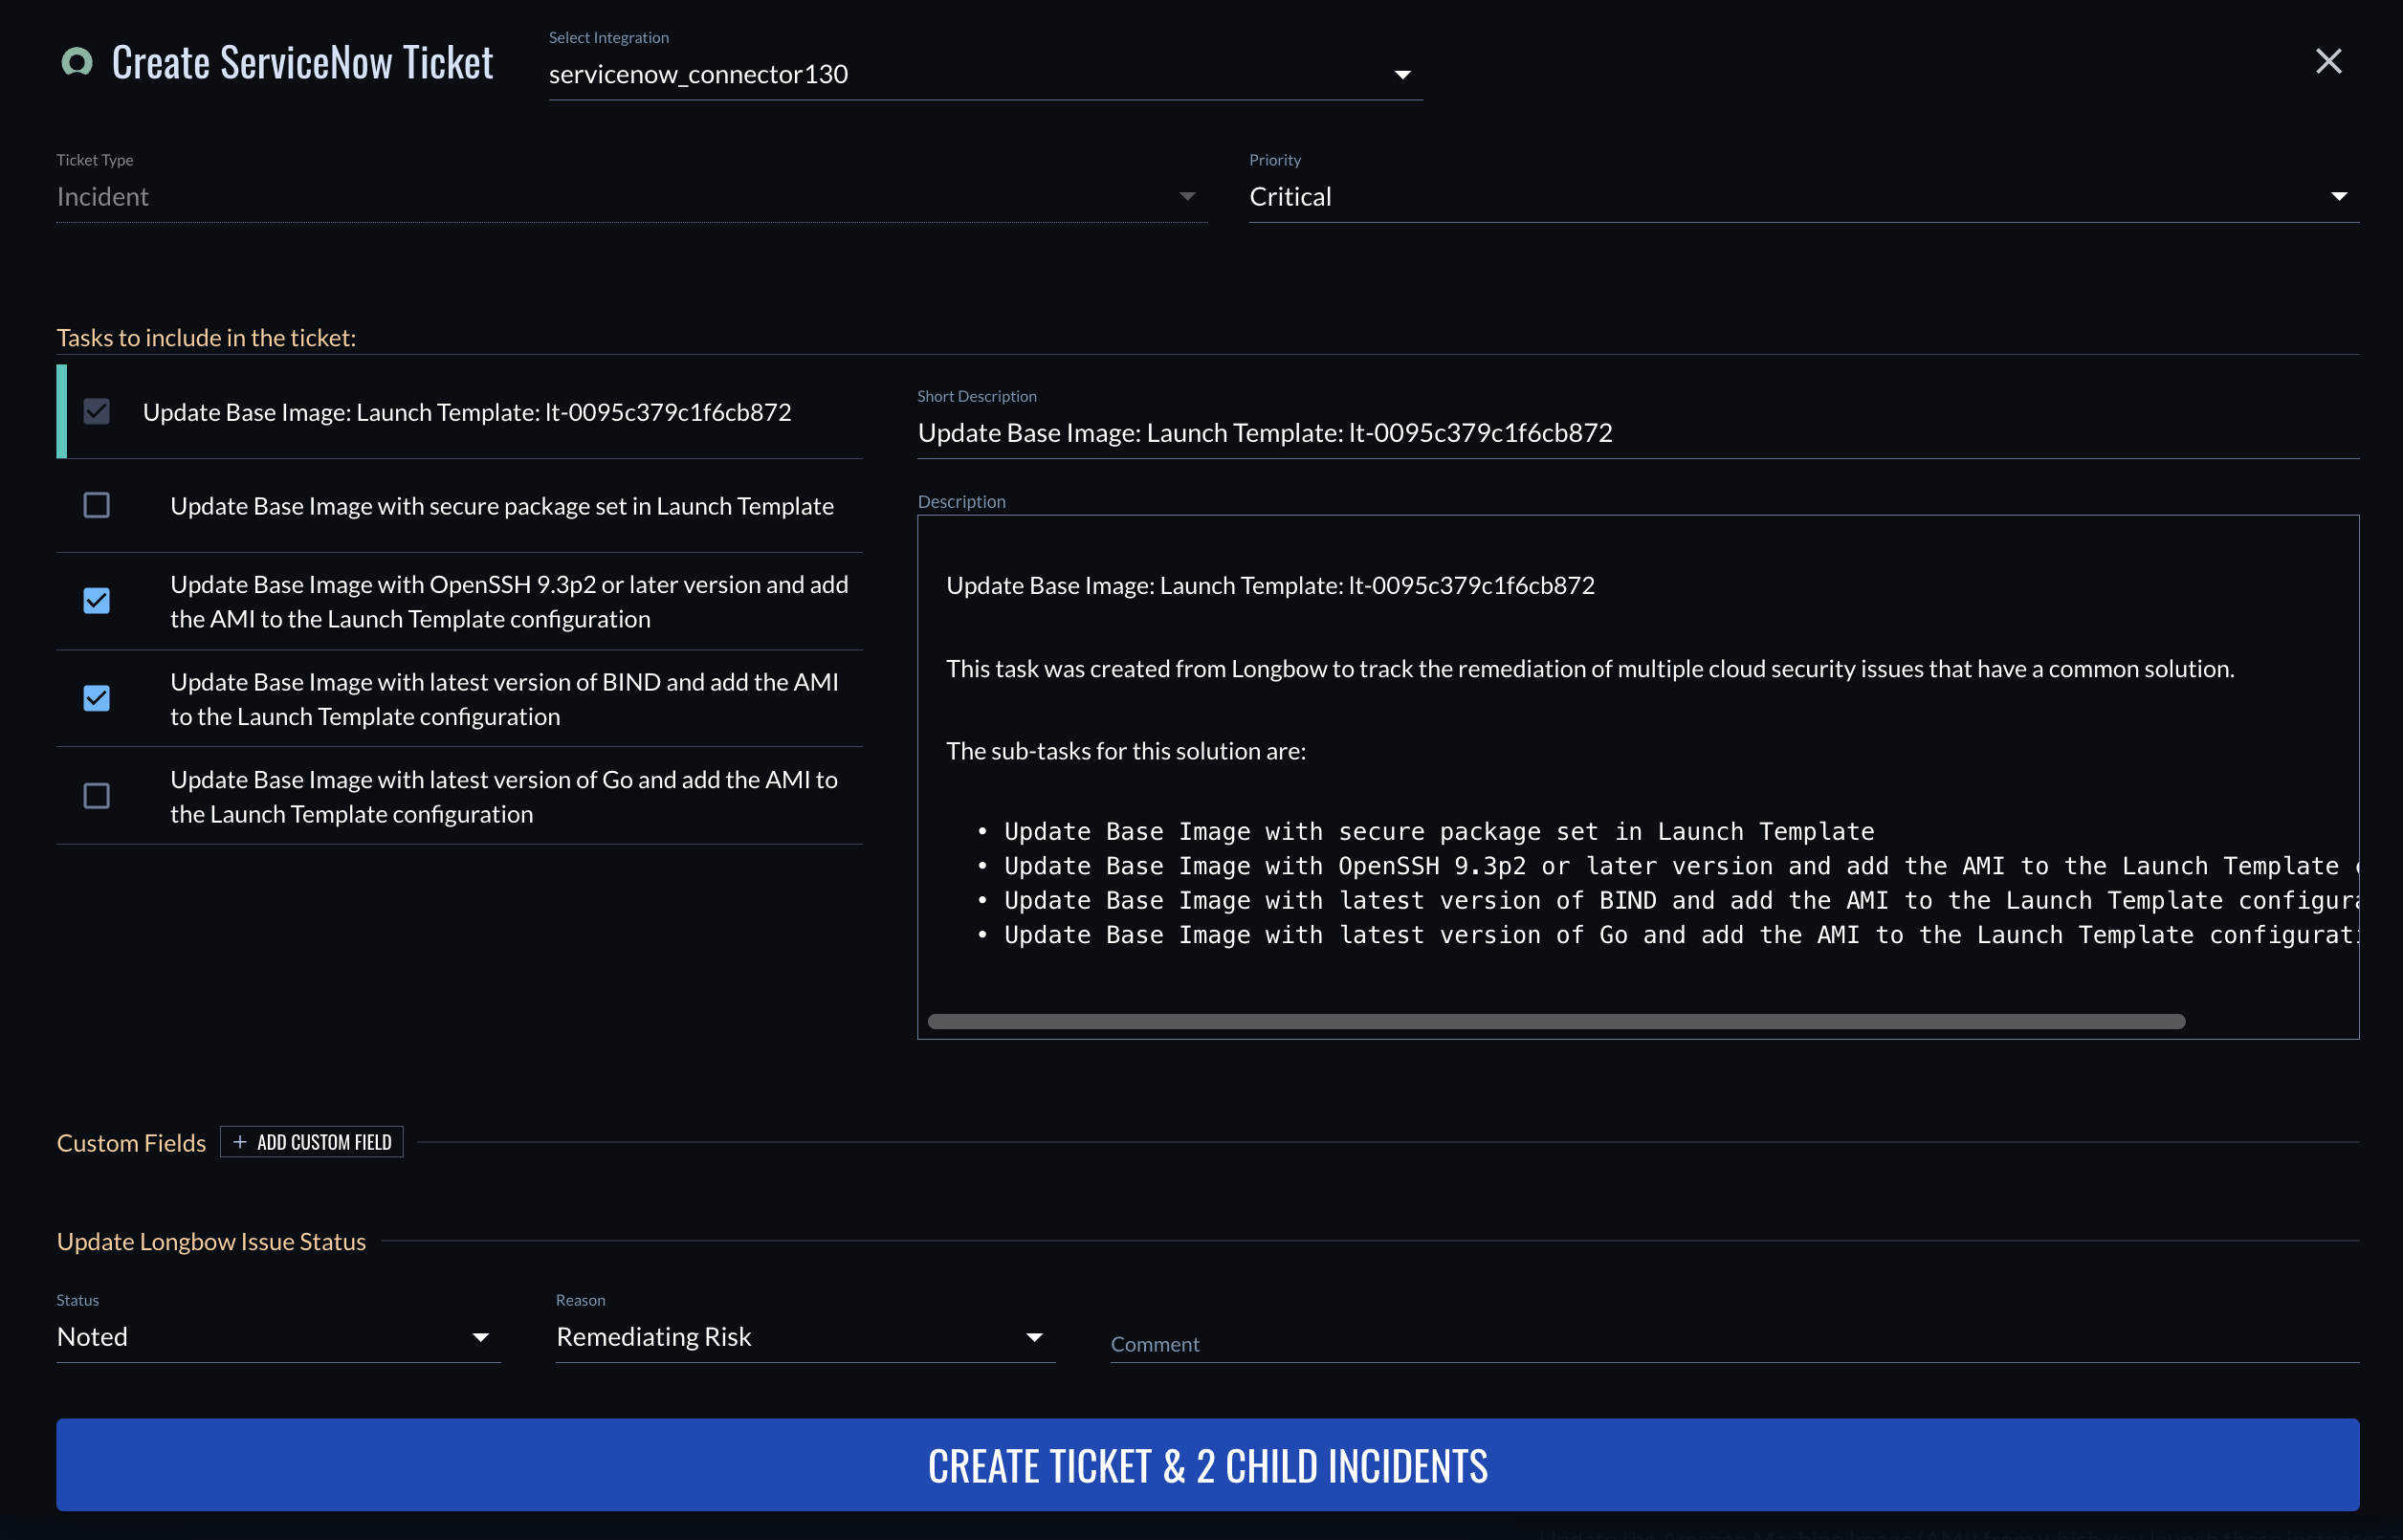
- Select Actions:[number] Changes > Create Ticket. VRM generates a ServiceNow ticket with following fields pre-populated:
- Connection name: The name of your ServiceNow connector.
- Ticket Type:
Incidentis the only supported ticket type. - Priority: the priority level of the incident.
- Short Description: the name of the issue. Not editable.
- Description: an outline of the affected assets, where the issues were detected, and possible solutions. Not editable.
- Custom Fields: see Custom fields for details.
- Status: the workflow status of the issue in VRM. By default, creating a ticket moves the status to
Noted. - Reason: the reason that the status is changing. By default, creating a ticket sets the reason to
Remediating Risk. - Comment: comments to include in the ServiceNow ticket.
- Tasks to include in the ticket: select each task for which you want to create a ServiceNow ticket. The ticket for each task will be a child of the parent ticket and inherits the custom field values from the parent.
- If necessary, edit the pre-populated fields.
- Select Create Ticket. When the ticket is created in ServiceNow, a pop-up window appears in VRM that includes a link to the ticket. For example:
Custom fields
Custom fields allow you to input key/value strings and pass the necessary data to ServiceNow. These values are important for two primary reasons:
- Teams have different workflows that require different fields for tracking metrics.
- Because ServiceNow has many fields, enumerating all fields would cause the form to be cluttered and confusing.
When adding custom fields, the key must be the expected backend representation of the field in ServiceNow, not how it appears in the UI. For example, Assigned To is represented as assigned_to in the ServiceNow backend.
To determine these field values, export your tickets as XML to see the correct formatting of the field. In ServiceNow, custom fields are always marked with a preceding u_. For example:
