REST APIs quickstart
This quickstart guides you through setting up and using Postman to interact with the Veracode REST APIs. For more advanced setup instructions for Java or Python, see Set up API authentication
To access the REST APIs with Postman, complete the following tasks:
- Obtain a Veracode account.
- Enable access to the APIs.
- Sign in to the Veracode Platform.
- Use the Veracode Platform to generate API credentials.
- Set up Postman and import an example collection of requests.
- Send your first request to authenticate with Veracode.
- Optionally, send requests to retrieve scan results.
Obtain a Veracode account
To access the Veracode APIs, you must have a user account. To complete this quickstart, your account does not require specific roles.
If you need an account, contact the Veracode Administrator for your organization.
Enable API access
For this quickstart, the Veracode APIs require access to analysiscenter.veracode.com and api.veracode.com, which are both in the Commercial region. Ensure your IT team adds both domains to your allowlist and allows one-way communication on port 443 to api.veracode.com.
If your account is in the European Region or the US Federal Region, these regions use specific domains that must be on your allowlist.
Refer to the complete list of domains and IP addresses to add to your allowlist.
Sign in to the Veracode Platform
To sign in to the Veracode Platform domain for your region, use one of the following methods. Each region has a unique URL. This quickstart uses the Commercial region domain: analysiscenter.veracode.com. Your account might be in a different domain, such as the European region: analysiscenter.veracode.eu
- If you have a new Veracode account, you received a welcome email that provides a link for activating your account in the Veracode Platform. If you did not receive the welcome email, contact your Veracode Administrator.
- If you have an active Veracode account, you can sign in to the Veracode Platform using the domain for your region. If your organization uses a Single Sign-On (SSO) portal such as Okta, you can also access the Veracode Platform with SSO.
Generate API credentials
The APIs authenticate with Veracode using Veracode API credentials (ID and secret key pair). For this quickstart, create Hash-based Message Authentication Code (HMAC) credentials.
The REST APIs support both Open Authorization (OAuth) Client Credentials and HMAC credentials, but the example Postman collection in the next section is only configured for HMAC authentication.
To complete this task:
- In the Veracode Platform, from the user account dropdown menu, select API Credentials.
- Select Generate API Credentials.
- Select HMAC credentials > Generate.
- Copy the ID and secret key to a secure location. You provide these credentials when setting up Postman.
Though not required for this quickstart, we recommend storing your HMAC credentials in an API credentials file.
Set up Postman
Install Postman, download and configure a Veracode example Postman Collection from GitHub, and add your HMAC API credentials to a new environment.
To complete this task:
-
Install the latest version of Postman.
-
Download the Veracode example collection.
-
Open Postman and import the collection
Veracode Example.postman_collection.jsoninto a new or existing workspace. -
Create an environment and give it a name, such as
Veracode. -
To add your HMAC credentials to the environment, add the following two variables (case-sensitive):
a. For Variable, enter
api_id. For Value, enter your API ID.b. For Variable, enter
api_key. For Value, enter your API Secret Key.noteIf your account is in the European region, you must delete
vera01ei-andvera01es-from the ID and key values. -
For added security, set both variables as sensitive.
-
If your account isn't in the Commercial region, change the values for the
base_urlvariable to the domain for your region. -
To save your environment, select Save.
Send your first request
Use Postman to send your first request to the Identity API and authenticate with Veracode.
To complete this task:
-
In Postman, select Collections, then expand the Veracode Example collection.
-
In the Veracode Example collection, select GET Self.
-
From the dropdown menu at the top-right, ensure the environment, such as
Veracode, that contains your HMAC API credentials is selected. If No environment is selected, change it to the correct environment.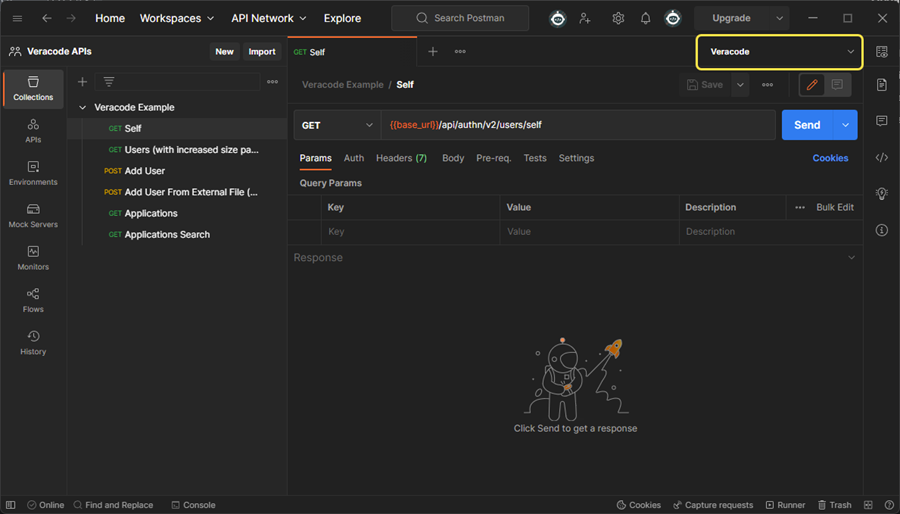
-
Select Send. If the request is successful, the response Status shows a green
200 OK. The Body tab shows details about your account, such as your username, organization, and any assigned roles. If you encounter errors, see troubleshooting.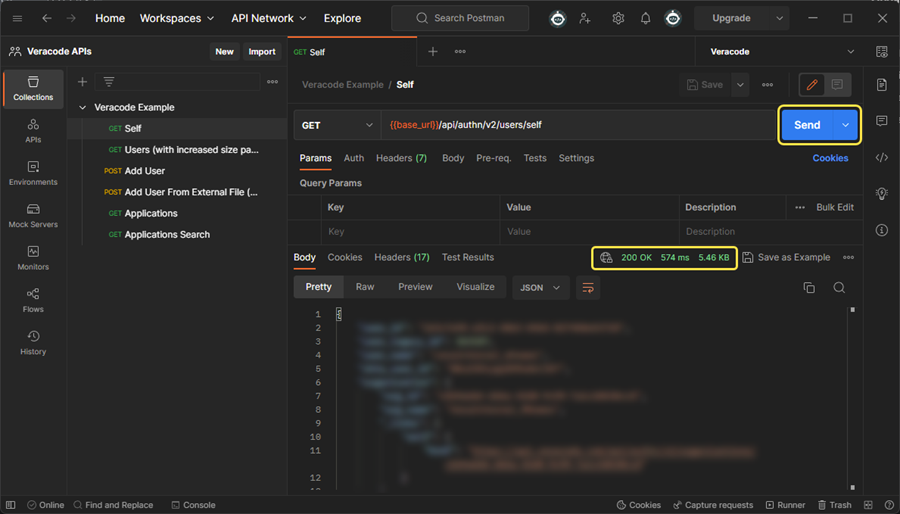
-
After sending a request, Postman adds the variable
hmacAuthHeaderto the environment. For added security, open the environment and set this variable as sensitive.
You can now use the REST APIs in Postman!
Optional: Retrieve scan results
This section is optional because your Veracode account must have the Reviewer role for reviewing results. To add this role to your account, contact the administrator for your organization.
The requests in this section use scan results from the demo application verademo.war, which is covered in the Static Analysis quickstart. The Static Analysis results contain both static flaws and Software Composition Analysis (SCA) vulnerabilities.
You use the REST APIs to retrieve and review the results of verademo.war in Postman.
Retrieve the application profile ID
Obtain the GUID of the application profile linked to the scan results.
To complete this task:
-
In the Veracode Example collection, select the GET Applications request.
-
To send a request to the Applications API, select Send.
To return a list of application profiles by name, append the
?name=query parameter to the request URL:{{base_url}}/appsec/v1/applications/?name=verademoThe following example shows the response for a Static Analysis of
verademo.war. Under theprofileproperty, notice that thenameproperty containsverademo. The GUID for the application profile isa99686b7-b54a-4fc4-abf5-cac0315fc041.{"id": 1571531,"oid": 72529,"last_completed_scan_date": "2022-10-31T13:41:35.000Z","guid": "a99686b7-b54a-4fc4-abf5-cac0315fc041","created": "2022-10-31T13:13:49.000Z","modified": "2022-10-31T13:41:35.000Z","app_profile_url": "HomeAppProfile:72529:1571531","scans": [{"scan_type": "STATIC","status": "PUBLISHED","modified_date": "2022-10-31T13:41:35.000Z","scan_url": "StaticOverview:72529:1571531:21801526:21772979:21788629","internal_status": "resultsready","links": [],"fallback_type": null,"full_type": null}],"last_policy_compliance_check_date": "2022-10-31T13:43:13.000Z","profile": {"name": "Verademo","tags": null,"business_unit": {"id": 76248,"name": "Not Specified","guid": "677a8473-a5f9-4a00-9275-072005a7f488"},"business_owners": [],"archer_app_name": null,"policies": [{"guid": "1300d04a-05fb-4f85-ba88-9bd664443725","name": "Veracode Recommended Very Low","is_default": true,"policy_compliance_status": "PASSED"}],"teams": [{"team_id": 136485,"team_name": "Demo Team","guid": "3b6ee442-8ac3-46c7-9a53-fb003322508f"}],"custom_fields": null,"description": null,"settings": {"nextday_consultation_allowed": false,"static_scan_xpa_or_dpa": true,"dynamic_scan_approval_not_required": false,"sca_enabled": false},"business_criticality": "VERY_LOW"},"results_url": "ViewReportsResultSummary:72529:1571531:21801526","_links": {"self": {"href": "https://api.veracode.com/appsec/v1/applications/a99686b7-b54a-4fc4-abf5-cac0315fc041"},"sandboxes": {"href": "https://api.veracode.com/appsec/v1/applications/a99686b7-b54a-4fc4-abf5-cac0315fc041/sandboxes{?page,size}","templated": true},"policy": {"href": "https://api.veracode.com/appsec/v1/policies/1300d04a-05fb-4f85-ba88-9bd664443725"}}},
Retrieve example results
You can now retrieve all Static Analysis and SCA results for verademo.war.
To complete this task:
-
In the Collections window, select the name of the collection Veracode Example.
-
Select the Variables tab.
-
For the Current value of the
app_guidvariable, enter the GUID for your application profile forverademo.war. For example, in Retrieve the application profile ID, the GUID isa99686b7-b54a-4fc4-abf5-cac0315fc041. -
Select Save.
-
Expand the Veracode Example collection and select GET All Static Findings.
-
Select Send.
The following example response shows a single flaw (finding) in the Static Analysis results for application profile GUID
a99686b7-b54a-4fc4-abf5-cac0315fc041."findings": [{"issue_id": 4,"scan_type": "STATIC","description": "<span>This database query contains a SQL injection flaw. The call to java.sql.Statement.execute() constructs a dynamic SQL query using a variable derived from untrusted input. An attacker could exploit this flaw to execute arbitrary SQL queries against the database. The first argument to execute() contains tainted data from the variable sqlQuery. The tainted data originated from earlier calls to AnnotationVirtualController.vc_annotation_entry, and java.sql.Statement.executeQuery.</span> <span>Avoid dynamically constructing SQL queries. Instead, use parameterized prepared statements to prevent the database from interpreting the contents of bind variables as part of the query. Always validate untrusted input to ensure that it conforms to the expected format, using centralized data validation routines when possible.</span> <span>References: <a href=\"https://cwe.mitre.org/data/definitions/89.html\">CWE</a> <a href=\"https://owasp.org/www-community/attacks/SQL_Injection\">OWASP</a></span>","count": 1,"context_type": "APPLICATION","context_guid": "a99686b7-b54a-4fc4-abf5-cac0315fc041","violates_policy": false,"finding_status": {"first_found_date": "2022-10-31T13:14:10.788Z","status": "OPEN","resolution": "UNRESOLVED","mitigation_review_status": "NONE","new": true,"resolution_status": "NONE","last_seen_date": "2022-10-31T13:41:34.620Z"},"finding_details": {"severity": 4,"cwe": {"id": 89,"name": "Improper Neutralization of Special Elements used in an SQL Command ('SQL Injection')","href": "https://api.veracode.com/appsec/v1/cwes/89"},"file_path": "com/veracode/verademo/commands/RemoveAccountCommand.java","file_name": "RemoveAccountCommand.java","module": "verademo.war","relative_location": 75,"finding_category": {"id": 19,"name": "SQL Injection","href": "https://api.veracode.com/appsec/v1/categories/19"},"procedure": "com.veracode.verademo.commands.RemoveAccountCommand.execute","exploitability": 0,"attack_vector": "java.sql.Statement.execute","file_line_number": 49},"build_id": 21801526}, -
To retrieve the SCA results for the same application profile, in the Veracode Example example collection, select GET All SCA Findings.
-
Select Send.
The following example response shows a single vulnerability (finding) in the SCA results for application profile GUID
a99686b7-b54a-4fc4-abf5-cac0315fc041."findings": [{"scan_type": "SCA","description": "junit is vulnerable to information disclosure. The vulnerability exists through the behaviour of `TemporaryFolder` on UNIX-like systems, where the system's temporary directory is shared between all users on that system by default.","count": 1,"context_type": "APPLICATION","context_guid": "a99686b7-b54a-4fc4-abf5-cac0315fc041","violates_policy": false,"finding_status": {"first_found_date": "2022-10-31T13:29:48.882Z","status": "OPEN","resolution": "UNRESOLVED","new": false,"resolution_status": "NONE","last_seen_date": "2022-10-31T13:30:08.255Z"},"finding_details": {"severity": 1,"cwe": {"id": 732,"name": "Incorrect Permission Assignment for Critical Resource","href": "https://api.veracode.com/appsec/v1/cwes/732"},"component_id": "4ebeadf3-e305-4520-8e20-f7b2b15141c4","licenses": [{"license_id": "epl-1.0","risk_rating": "3"}],"metadata": {"sca_scan_mode": "UPLOAD","sca_dep_mode": "UNKNOWN"},"cve": {"name": "CVE-2020-15250","cvss": 1.9,"href": "http://nvd.nist.gov/vuln/detail/CVE-2020-15250","severity": "Very Low","vector": "AV:L/AC:M/Au:N/C:P/I:N/A:N","cvss3": {"score": 5.5,"severity": "Medium","vector": "AV:L/AC:L/PR:N/UI:R/S:U/C:H/I:N/A:N"}},"product_id": "f60afc17-560b-4caf-817f-5233bfd5ccc7","component_filename": "junit-4.13.jar","language": "JAVA","component_path": [{"path": "verademo.war#zip:WEB-INF/lib/junit-4.13.jar"}],"version": "4.13"}},
Next steps
- Try other example requests for the Identity API.
- Try other example requests for the Applications API.
- Try other example requests for the Findings API.
- Read the best practices for using the Veracode APIs.
- Review the usage guidelines for the Veracode APIs.