Set up the JFrog Artifactory connector
JFrog Artifactory is a universal artifact repository that securely stores, manages, and distributes software packages, binaries, and containers.
By integrating JFrog Artifactory, Veracode Risk Manager (VRM) leverages its insights to recommend the best next actions for security teams, ensuring seamless alignment with their broader tool stack and promoting a unified, strategic approach to security management.
Complete the following tasks to set up your VRM connector for JFrog Artifactory.
JFrog requirements
To configure the VRM connector, you must have the JFrog Platform Admin role or the Project Admin role for the project that you want to integrate with VRM.
Create a group
Create a group in JFrog Artifactory to manage who will have permissions to read data from the repositories that you want to integrate with VRM.
Though you can assign the token to a user, Veracode recommends using a group to avoid failures if a user is not part of the system any longer.
-
In the JFrog Platform, select the Administration tab.
-
From the left navigation menu, select User Management > Groups.
-
Select New Group.
-
Enter a name and, optionally, a description for the group.

NOTE: You do not need to add users to the group in order to integrate with VRM.
-
Select Save.
Create a permission
Create a permission in JFrog Artifactory that grants read access to the repositories that you want to integrate with VRM.
-
In the JFrog Platform, from the left navigation menu, select User Management > Permissions.
-
Select New Permission.
-
Enter a name for the permission.
-
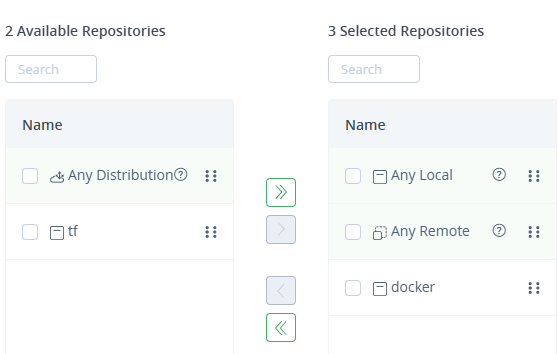
Under Resources, select Add Repositories.
-
Select the repositories that you want to include in the permission and move them to the Selected Repositories list.
-
Select Ok.
-
Select the Groups tab.
-
Select the group that you created in Create a Group and move it to the Selected Group list.
-
Select Ok.
-
Under Selected Group Repositories, select Read.

-
Select Create.
Create a token
Create a token that you must use to grant VRM access to your JFrog Artifactory repositories.
-
In the JFrog Platform, from the left navigation menu, select User Management > Access Tokens.
-
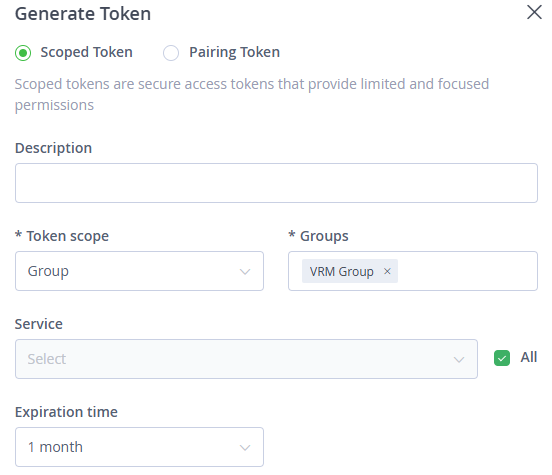
Select Generate Token.
-
For Token Scope, select Group.
-
For Groups, select the group that you created in Create a Group.
-
For Service, select All.
-
Select an expiration time. When the token expires, you will need to update the token in the VRM platform.
-
Select Generate.
-
Copy the token to a secure location.
Create a VRM connector
- In VRM, from the left navigation menu, select the Settings icon
 .
. - Select Add Connector.
- Select the JFrog Artifactory tile.
- Enter a name for the connector.
- For Access Token, paste the token that you generated in JFrog Artifactory.
- For URL, enter the base URL for your organization's JFrog Platform account. For example:
MyOrganization.jfrog.io - Select Add Connector.
Validate your data
After successfully connecting the JFrog Artifactory Connector within VRM, it will take some time for VRM to fetch the asset data.
After the connector has completed the fetch, validate that VRM correctly ingested the data.
- In VRM, select Assets
 from the left navigation menu.
 - Select the Asset Type filter and select JFrog Artifactory Image.
The Assets table lists the JFrog Artifactory assets.