DAST quickstart
This quickstart guides you through running your first scan using Veracode DAST.
You can use DAST to analyze the following assets:
- Web applications
- REST APIs
Create a Full scan target that specifies the URL for the web application or API you want to analyze, then run the analysis from that target. DAST crawls the URL, scans all content, and analyzes the content to discover vulnerabilities. From within the target, you can monitor the analysis, review results, and configure settings and integrations.
Video: DAST quickstart
Prerequisites
- You must have a user account in the Commercial or European Region with the Creator and Submitter roles or the Security Lead role. To review results, you must have the Reviewer role. The United States Federal Region is not supported. If you don't have an account, on the Sign in page in the Veracode Platform, select Sign up for a free 14-day trial.
- If you are behind a firewall, ensure the required IP addresses are on your allowlist.
- For an analysis of an API, ensure you have the URL where your API specification file is located. You can also provide the URL and the API specification file through a webhook. The file must be OpenAPI 2.0 (Swagger) or 3.0 in JSON or YAML. HAR files are not supported.
Access DAST
- Sign in to the Veracode Platform. If you're using a free trial account, the Target list page opens automatically.
- Select Scans & Analysis > DAST. The Target list page opens.
Create a target
-
On the Target list page, select ADD TARGET.
-
Select A web application or An API, then select NEXT.
-
To specify the scope or depth of the scan, on the Select scope page, select Quick scan or Full scan. The scan scope determines which security scanners run, by default.
-
A Quick scan takes approximately three to five minutes to complete. It runs only non-invasive scanners and detects basic misconfigurations in your web application or API that a hacker might exploit.
-
A Full scan (Enterprise mode) can take from 30 minutes to more than 24 hours to complete. It runs all security scanners to mimic the same actions a hacker might take to exploit your web application or API. The scanners only use non-destructive injection code.
-
-
Select NEXT.
-
For TARGET NAME, enter a name for the analysis. Ensure the name is unique to your organization and provides a human-readable description of the analysis.
-
For URL or IPv4, enter the base URL with protocol (
http://orhttps://). By default, the DAST scanner followshttp://orhttps://URLs regardless of the protocol in the target URL.note- To scan an internal IP address with Internal Scanning Management (ISM), enter the base URL in URL or IPv4. After you create the target, set up ISM on the target configuration page.
- The following targets are invalid:
http://localhosthttps://localhosthttp://127.0.0.1https://127.0.0.1
-
For TEAM, select one or more teams. If your account has the Security Lead role, selecting a team is optional.
-
To certify that you have the right to scan the target URL, select the corresponding checkbox.
noteOnly scan URLs that you have the right to scan. Otherwise, your hosting provider might flag the scan as malicious activity.
-
Select CREATE TARGET. The page for your new target opens.
Run the analysis
-
On the Target list page, select the name of your target.
-
Select RUN ANALYSIS.
-
To monitor the progress, on the Target details page, check the Status column. An active analysis shows the status as Running. You can also see the Target type, the time when the scan started, and the duration of the analysis.

The bar chart shows an overview of the severity of all analyzed findings or vulnerabilities.
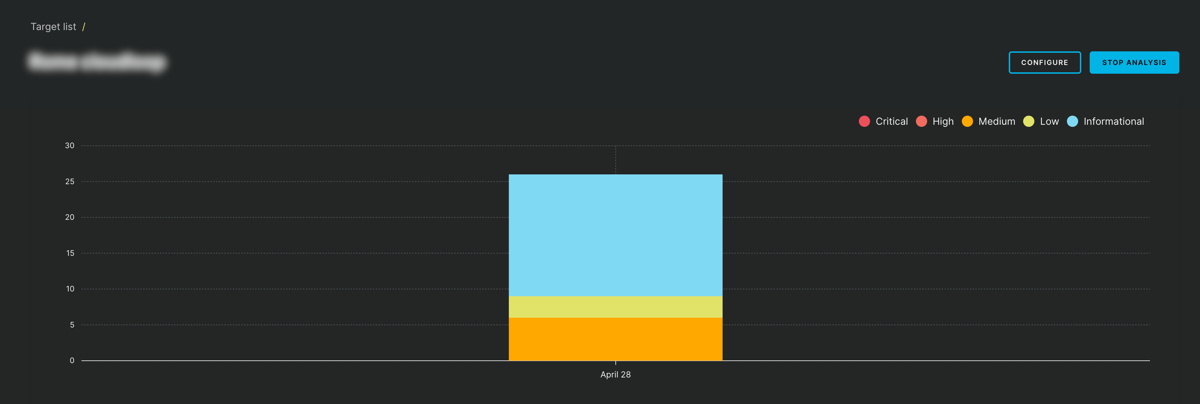
To stop a scan, select STOP ANALYSIS.
-
To see more details about each scanner, on the Target details page, in the URL column, select the hyperlink.

To view the status of each scanner, review the Status column.

Review the results
The results appear in real-time as the analysis runs. You can see the findings as the scanners discover them and, for a web application, the crawled URLs for each page.
- To review the findings, select the Findings tab. All findings are sorted by CWE severity. See the category, severity score, and a description on how to mitigate or resolve the finding. You can also see the number of findings and the distribution of severities in the pie chart.
- To see a list of all crawled URLs, select the Coverage tab.
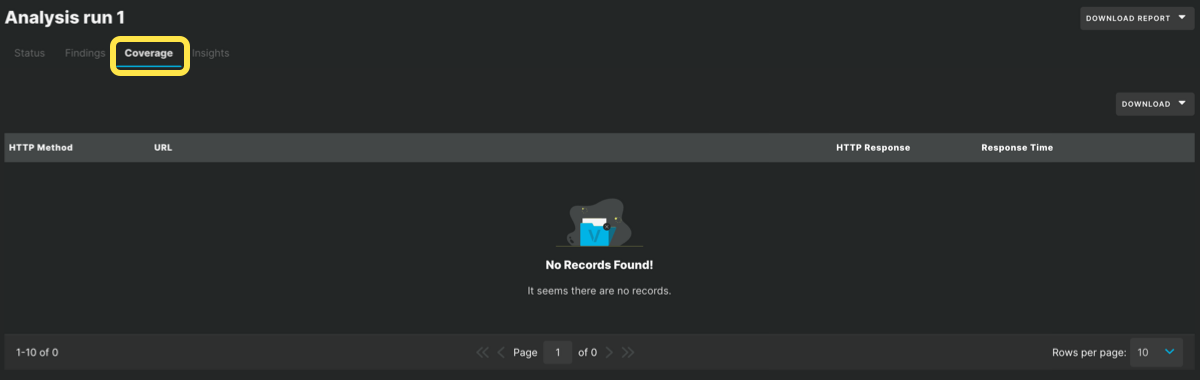
To download reports for crawled URLs, the scan activity log, and unique URLs found, ensure that the scan is finished. Then, select DOWNLOAD and the required report type.
Optional: Configure the target
After you create a target, you can configure various settings on the Configure target page.
-
On the Target list page, select the name of your target.
-
To open the Configure target page, select CONFIGURE.
-
Select a tab to access the configuration options. For example:
- To automate your analyses, you can schedule them. Select the Automation tab, then set a schedule for an analysis to run daily, weekly, or monthly.
- To add DAST to a CI/CD pipeline through a webhook, select the Integrations tab. Then, select your provider, such as Jenkins, read the instructions, and add it to a step in your pipeline. Veracode recommends that you add the analysis to a pre-production, staging, or test pipeline.
Next steps
- Learn more about the scanners.
- Explore available integrations.
- Learn about the advanced capabilities of Enterprise mode.