Set up and use the Aqua Security CWPP connector
Aqua Security Workload Protection, often referred to as Cloud Workload Protection (CWPP), secures cloud-native applications and environments.
By integrating Aqua Security, Veracode Risk Manager (VRM) leverages its insights to recommend the best next actions for security teams, ensuring seamless alignment with their broader tool stack and promoting a unified, strategic approach to security management.
Aqua requirements
The VRM connector for Aqua Security Workload Protection must be able to access the vulnerability data in Aqua. To set up the connector, you must meet the following requirements:
- Have an Aqua Security account with Administrator permissions.
- If you use an on-premises instance of Aqua Security, know the endpoint URL of your instance.
Create permission set and role
You must assign a role with a specific permission set to the API key that you use to authenticate the VRM connector.
- Log in to the Aqua Security platform.
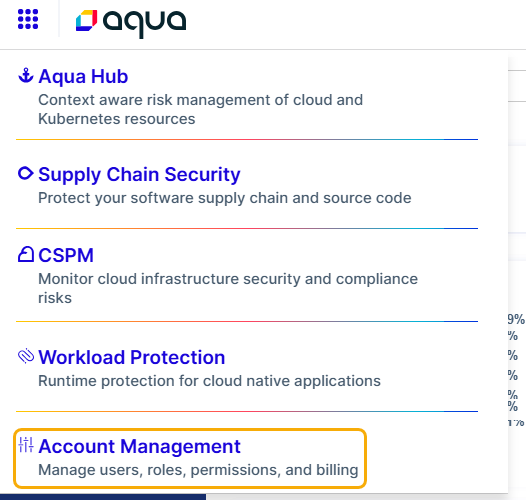
- From the top-left menu, select Account Management.
- From the left navigation menu, select Permission Sets and select Add Permission Set.
- Enter a name for the permission set.
- In the Aqua Hub, CSPM, and Workload Protection sections, do the following:
-
Set the toggle to Module is Enabled.
-
Select Set all as > View.
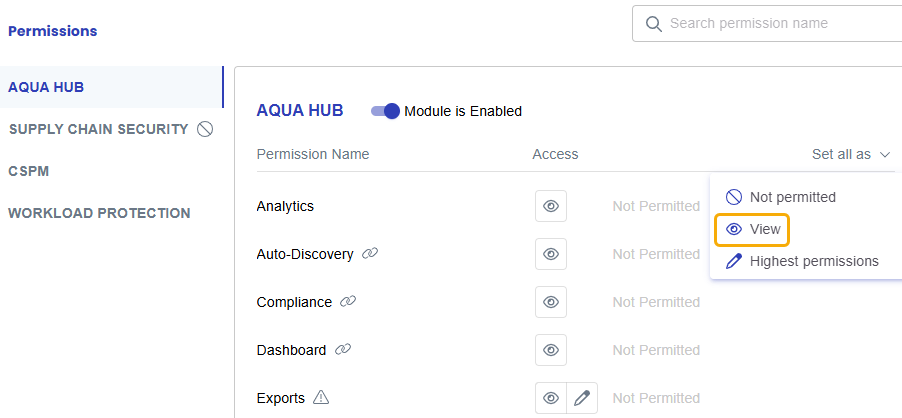
-
Select Confirm.
-
- Select Save.
- From the top-left menu, select Account Management.
- From the left navigation menu, select Roles and select Add Role.
- Enter a name for the role.
- For Permission Set, select the permission set you created.
- For Application Scope(s), select Global.
- Select Save.
Configure API key
Prerequisites:
You must have created a role with the required permission set.
To complete this task:
-
Log in to the Aqua Security platform.
-
From the top-left menu, select Account Management.
-
From the left navigation menu, select Settings > API Keys.
-
Select Generate Key.
-
Enter a description for the new API key and select Create.
-
Copy the API Key and Secret values to a secure location. You will not be able to view them again after you close the window.
-
On the API Keys page, select the vertical ellipses for the API key you just created and select Edit.
-
Clear the Enable global admin permission toggle.
-
Select the roles:assign and tokens:readwrite permissions.
-
From the dropdown list, select the Aqua role that you created.
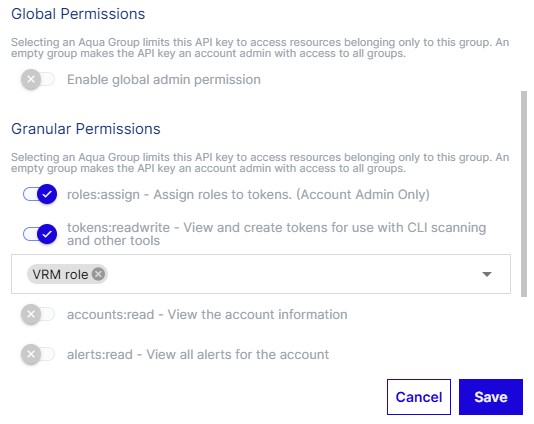
-
Select Save.
Create a VRM connector
- In VRM, from the left navigation menu, select the Settings icon
 .
. - Select Add Connector.
- Select the Aqua Security Workload Protection tile. enter a name for the connector.
- Enter the API key and secret you generated in Aqua.
- If you want to pull the findings from an on-premises Aqua Security instance, enter the endpoint URL of the instance. The SaaS endpoint URL is populated by default.
- Select Add Connector.
After the connector is created, VRM begins fetching your findings, which can take several minutes.
To view the fetched findings in VRM, select Findings ![]() from the left navigation menu and search for findings with a Finding Source of Aqua Security Workload Protection.
from the left navigation menu and search for findings with a Finding Source of Aqua Security Workload Protection.